Mục lục
Spring Framework phiên bản 5 đã giới thiệu WebClient, một trong những thành phần quan trọng của Web Reactive framework giúp chúng ta triển khai reactive và non-blocking web application.
Trong các ứng dụng web một trong những công việc thường xuyên phải thực hiện đó là thực hiện một HTTP Request đến các server khác, kể cả các ứng dụng RestAPI Spring Boot cũng có nhu cầu này. Các phiên bản trước Spring 5, chúng ta có RestTemplate để làm công việc này. Tuy nhiên với nhiều hạn chế của RestTemplate nên nó đã được thay thế bởi WebClient, từ các phiên bản sau RestTemplate bị đánh dấu deprecated và không còn được cập nhật các tính năng mới.
WebClient là gì?
WebClient là một interface cung cấp các API dùng để thực thi các HTTP request. Nó được tạo ra như một phần của module Spring Web Reactive và sẽ thay thế RestTemplate trong tương lai. Ngoài ra, để triển khai cơ chế reactive và non-blocking nên WebClient sẽ không hoạt động trên phiên bảng HTTP/1.1 protocol.
Dependency
Vì chúng ta đang sử dụng ứng dụng Spring Boot, tất cả những gì chúng ta cần là spring-boot-starter-webflux.
Maven dependency
<dependency>
    <groupId>org.springframework.boot</groupId>
    <artifactId>spring-boot-starter-webflux</artifactId>
</dependency>
Gradle
dependencies {
    compile 'org.springframework.boot:spring-boot-starter-webflux'
}
Thao tác cơ bản trên WebClient
Khởi tạo WebClient
Để tạo một WebClient object chúng ta có thể sử dụng create() method với Base URL.
WebClient webClient1 = WebClient.create();

WebClient webClient2 = WebClient.create("http://localhost:8080");
Hoặc sử dụng WebClient.Builder AP
WebClient webClient2 = WebClient.builder()
        .baseUrl("http://localhost:8080")
        .defaultHeader(HttpHeaders.CONTENT_TYPE, MediaType.APPLICATION_JSON_VALUE)
        .build();
Gửi HTTP request
Để gửi một HTTP request trong WebClient chúng ta phải đi qua các bước sau:
- Tạo WebClient.UriSpec thông qua hàm method(HttpMethod) hoặc sử dụng các hàm dựng sẵn như get(), post(), put() và delete().
- Tạo URI.
- Tạo các thông tin header, các thông tin xác thực nếu được yêu cầu.
- Tạo body request nếu cần thiết.
- Gọi retrieve() hoặc exchange() method để gửi request đi và nhận kết quả trả về. Lưu ý exchange() method trả về ClientResponse chứa status và header response. Chúng ta có thể lấy response body từ ClientResponse.
- Xử lý response trả về.
WebClient webClient = WebClient.create("http://localhost:3000");

Employee createdEmployee = webClient.post()
        .uri("/employees")
        .header(HttpHeaders.CONTENT_TYPE, MediaType.APPLICATION_JSON_VALUE)
        .body(Mono.just(empl), Employee.class)
        .retrieve()
        .bodyToMono(Employee.class);
Xử lý response trả về
Nếu chỉ quan tâm đến response body thì chúng ta chỉ cần sử dụng bodyToFlux() và bodyToMono().
Ngoài ra, nếu sử dụng exchange() method, nó sẽ trả về ClientResponse chứa tất cả các thông tin về header, status, và response body.
Xin lưu ý rằng các phương thức bodyToMono() và bodyToFlux() chỉ quan tâm đến response. Nếu mã trạng thái phản hồi là 4xx (lỗi máy khách) hoặc 5xx (lỗi máy chủ) thì các phương thức này sẽ ném ra WebClientException
Project Setup
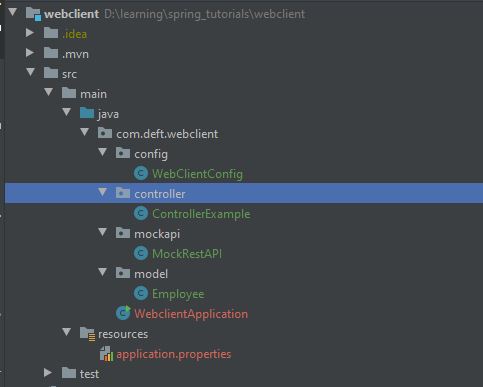
WebClient có thể sử dụng để request đến một Rest API bất kỳ, tuy nhiên để đảm bảo ví dụ có thể hoạt động trong khuôn khổ bài viết này, mình sẽ sử dụng WebClient request đến chính server hiện tại.
package com.deft.webclient.model;

import lombok.AllArgsConstructor;
import lombok.Data;
import lombok.NoArgsConstructor;

@Data
@NoArgsConstructor
@AllArgsConstructor
public class Employee {

    private long id;
    private String firstName;
    private String lastName;
    private long yearlyIncome;
}
Trong đó sử dụng mình sử dụng Lombok để giảm bớt các các bước triển khai constructor, getter, setter v.v
Tiếp theo định nghĩa một MockRestAPI định nghĩa các API mà sau đó chúng ta sẽ dùng WebClient để request đến.
package com.deft.webclient.mockapi;

import com.deft.webclient.model.Employee;
import org.springframework.http.HttpStatus;
import org.springframework.http.MediaType;
import org.springframework.http.ResponseEntity;
import org.springframework.web.bind.annotation.*;

import java.util.*;
import java.util.stream.Collectors;


@RestController
@RequestMapping("/mock")
public class MockRestAPI {

    private static final Map<Long, Employee> employees;
    private static Long nextID = 1L;

    static {
        employees = new HashMap<>();
        employees.put(nextID, new Employee(nextID++, "John", "Doe", 80000));
        employees.put(nextID, new Employee(nextID++, "Mary", "Jackson", 75000));
        employees.put(nextID, new Employee(nextID++, "Peter", "Grey", 60000));
        employees.put(nextID, new Employee(nextID++, "Max", "Simpson", 67000));
        employees.put(nextID, new Employee(nextID++, "Lisa", "O'Melly", 45000));
        employees.put(nextID, new Employee(nextID++, "Josephine", "Rose", 52000));
    }

    @GetMapping("/{id}")
    public Employee getEmployee(@PathVariable Long id) {
        Optional<Employee> employee = Optional.ofNullable(employees.get(id));
        return employee.orElse(null);
    }

    @GetMapping
    public List<Employee> getAllEmployee() {
        return new ArrayList<>(employees.values());
    }

    @PostMapping(consumes = MediaType.APPLICATION_JSON_VALUE,
            produces = MediaType.APPLICATION_JSON_VALUE)
    public ResponseEntity<Employee> create(@RequestBody Employee newEmployee) {
        newEmployee.setId(nextID++);
        employees.put(newEmployee.getId(), newEmployee);

        return ResponseEntity.status(HttpStatus.CREATED)
                .header("Location", "/rest/employees/" + newEmployee.getId())
                .body(newEmployee);
    }

    @PutMapping(path = "/{id}",
            consumes = MediaType.APPLICATION_JSON_VALUE,
            produces = MediaType.APPLICATION_JSON_VALUE)
    public ResponseEntity<Employee> update(@PathVariable long id, @RequestBody Employee request) {
        if (!employees.containsKey(id)) {
            return ResponseEntity.notFound().build();
        } else {
            Employee employee = employees.get(id);
            employee.setFirstName(request.getFirstName());
            employee.setLastName(request.getLastName());
            employee.setYearlyIncome(request.getYearlyIncome());

            return ResponseEntity.ok(employee);
        }
    }

    @DeleteMapping(path = "/{id}")
    public ResponseEntity<Void> delete(@PathVariable long id) {
        Employee removedEmployee = employees.remove(id);

        return removedEmployee != null ? ResponseEntity.ok().build() : ResponseEntity.notFound().build();
    }
}
Có nhiều cách để khởi tạo một WebClient object, tuy nhiên mình sẽ khởi tạo WebClient bean và sử dụng nó trong xuyên suốt ứng dụng.
package com.deft.webclient.config;

import org.springframework.context.annotation.Bean;
import org.springframework.context.annotation.Configuration;
import org.springframework.http.HttpHeaders;
import org.springframework.http.MediaType;
import org.springframework.web.reactive.function.client.WebClient;

@Configuration
public class WebClientConfig {

    @Bean
    public WebClient webClient() {
        return WebClient.builder()
                .baseUrl("http://localhost:8080/mock")
                .defaultHeader(HttpHeaders.CONTENT_TYPE, MediaType.APPLICATION_JSON_VALUE)
                .build();
    }
}
Ví dụ sử dụng WebTemplate
GET Request
Thông thường GET API dùng để lấy dữ liệu từ server, trong ví dụ này chúng ta sẽ dùng GET để lấy danh sách tất các employee hoặc một employee theo ID duy nhất.
HTTP GET /: Lấy danh sách tất cả các EmployeeHTTP GET /{id}: Lấy một employee theo ID.
package com.deft.webclient.controller;

import com.deft.webclient.model.Employee;
import org.springframework.beans.factory.annotation.Autowired;
import org.springframework.web.bind.annotation.GetMapping;
import org.springframework.web.bind.annotation.PathVariable;
import org.springframework.web.bind.annotation.RequestMapping;
import org.springframework.web.bind.annotation.RestController;
import org.springframework.web.reactive.function.client.WebClient;
import reactor.core.publisher.Flux;
import reactor.core.publisher.Mono;


@RestController
@RequestMapping("/")
public class ControllerExample {

    @Autowired
    private WebClient webClient;

    @GetMapping("/{id}")
    public Mono<Employee> findById(@PathVariable String id) {
        return webClient.get()
                .uri("/" + id)
                .retrieve()
                .bodyToMono(Employee.class);
    }

    @GetMapping()
    public Flux<Employee> findAll() {
        return webClient.get()
                .uri("/")
                .retrieve()
                .bodyToFlux(Employee.class);
    }

}
Post request
Post API thường được dùng để tạo mới một resource. Trong ví dụ này chúng ta sẽ dùng post() để tạo mới một employee.
@PostMapping
public Mono<Employee> create() {
    Employee employee = new Employee();
    employee.setFirstName("deft");
    employee.setLastName("blog");
    employee.setYearlyIncome(2021);
    return webClient.post()
            .uri("/")
            .body(Mono.just(employee), Employee.class)
            .retrieve()
            .bodyToMono(Employee.class);
}
PUT request
Sử dụng PUT request để cập nhật một employee theo ID,
@PutMapping("/{id}")
public Mono<Employee> update(@PathVariable String id) {
    Employee employee = new Employee();
    employee.setFirstName("deft");
    employee.setLastName("blog");
    employee.setYearlyIncome(2021);
    return webClient.put()
            .uri("/" + id)
            .body(Mono.just(employee), Employee.class)
            .retrieve()
            .bodyToMono(Employee.class);
}
DELETE request
DELETE được sử dụng phổ biến trong trường hợp chúng ta muốn xóa tài nguyên.
@DeleteMapping
public Mono<Void> delete(@PathVariable String id) {
    return webClient.delete()
            .uri("/" + id)
            .retrieve()
            .bodyToMono(Void.class);
}
Một số WebClient config
Memory limit
Spring WebFlux cấu hình mặc định cho giới hạn bộ nhớ đệm trên memory là 256KB. Nếu vượt quá giới hạn này trong bất kỳ trường hợp nào thì chúng ta sẽ gặp phải lỗi DataBufferLimitException.
Để đặt lại giới hạn bộ nhớ, hãy định cấu hình thuộc tính dưới đây trong tệp application.properties.
spring.codec.max-in-memory-size=1MB
Connection Timeout
Chúng ta có thể sử dụng HttpClient để đặt connection timeout cũng như read timeout và write timeout.
package com.deft.webclient.config;

import io.netty.channel.ChannelOption;
import io.netty.handler.timeout.ReadTimeoutHandler;
import io.netty.handler.timeout.WriteTimeoutHandler;
import org.springframework.context.annotation.Bean;
import org.springframework.context.annotation.Configuration;
import org.springframework.http.HttpHeaders;
import org.springframework.http.MediaType;
import org.springframework.http.client.reactive.ClientHttpConnector;
import org.springframework.http.client.reactive.ReactorClientHttpConnector;
import org.springframework.web.reactive.function.client.WebClient;
import reactor.netty.http.client.HttpClient;

@Configuration
public class WebClientConfig {

    @Bean
    public WebClient webClient() {

        HttpClient httpClient = HttpClient.create()
                .tcpConfiguration(client ->
                        client.option(ChannelOption.CONNECT_TIMEOUT_MILLIS, 10000)
                                .doOnConnected(conn -> conn
                                        .addHandlerLast(new ReadTimeoutHandler(10))
                                        .addHandlerLast(new WriteTimeoutHandler(10))));

        ClientHttpConnector connector = new ReactorClientHttpConnector(httpClient);

        return WebClient.builder()
                .baseUrl("http://localhost:8080/mock")
                .clientConnector(connector)
                .defaultHeader(HttpHeaders.CONTENT_TYPE, MediaType.APPLICATION_JSON_VALUE)
                .build();
    }
}
Kết bài
Như vậy là chúng ta đã có một công cụ mới thay thế RestTemplate để thực thi các HTTP request trong các ứng dụng Spring với nhiều tính năng và hiệu xuất tốt hơn. Nếu bạn vừa mới bắt đầu dự án Spring gần đây, thì hãy sử dụng WebClient liền nhé.
Mã nguồn được mình công khai trên gitlab để các bạn tiện tham khảo: webclient
Nguồn
https://howtodoinjava.com/spring-webflux/webclient-get-post-example/#create-instance
Spring 5 WebClient
https://www.baeldung.com/spring-5-webclient